We all get to that point where we about to throw our photocopier out the window because its not behaving how we want it to. Below we will be looking at some common frustrations and how to resolve these. Making your office printing much less hassle and in turn keeping all your hair intact!
Paper jams 
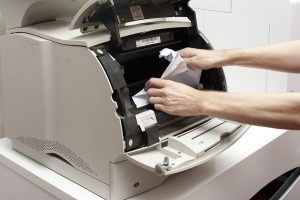
Does you copier constantly get paper jams and you don’t know why! Tired of pulling out scraps of paper only for the copier to jam again. There are a few things to check to try and avoid paper jams.
- What kind of paper are you using? Make sure to check the paper you are using is actually compatible with your copier. Some copiers have a minimum requirement for thickness of paper.
- Where are you storing your paper? Be sure to store your paper in a cool, dry space. If the paper gets slightly damp it will get jammed in the copier.
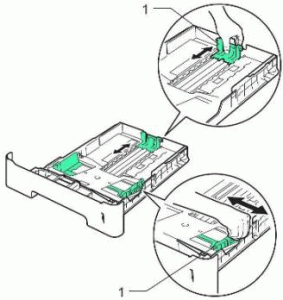
- Make sure you align the paper guides correctly with the paper size in the tray. Not doing this can confuse the copier as to what paper size is in the tray
Print quality issues
Is your copier device not performing color quality the way it is supposed to. A few routine maintenance tasks can rectify these problems for you.
- Clean the CVT (Constant Velocity Transport glass) – Regularly cleaning this glass can rectify quality issues when scanning and copying from the document feeder. First lift the scanner bed, there will be a big square glass panel on the right and a smaller glass strip on the left. Clean both these with some kitchen towel and glass cleaner if you have some. If not then just try a simple mix of water and a tiny bit of washing up liquid will do. Do not apply cleaner directly onto the glass.
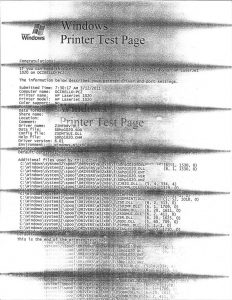
- Lines of prints – If you are experiencing lines of a specific color or multiple when printing you may need to clean the Printhead lenses. Open the front or side panel of the device and locate where the drums or imaging unit are held. Below these you should see a laser window slot for each colour or only one if it is a mono device. Insert the cleaning wand slowly into each laser window slot until it stops, and then slowly slide the wand out. Repeat this process for each laser lens. Then close the front or side panel and test print again to see if the issue is resolved.
- Light prints – If you are experiencing light printing it is best to check the density controls on the copier. Someone may have adjusted these to suit their requirements and not reset the controls after use. Resetting these controls is the best solution. If you are not sure how to do this then simply restarting the device will reset to the saved settings.
Also remember to check all consumable levels in the device. It is not just low toner that can affect the print quality. Check the life remaining in the drums, imaging unit, bias transfer roll and fuser unit. If any of these consumables are below 10% it is best to replace them as this is when they start affecting print quality. If you are having issues with one specific color then try swapping the relating color drum for a new one. Even if it is not low it could be defective. Once you have replaced any consumables if the issue still occurs try giving the device a reboot which will force it to recognize the new part installed.
Paper tray issues 
Is your copier constantly telling you to add media to a paper tray or that your document is not recognized. Don’t forget that every time you add paper to a tray the copier will ask you to confirm the size & type. The majority of business will have set paper trays for set media types. If you are trying to print on different media just make sure you are selecting the correct option when the copier prompts you to. For example tray 1 is a dedicated tray for A4 80gsm paper, but one user would like to print A5 90gsm paper. They load the paper in the tray, shut it and walk away. The copier will prompt to confirm this type, if it is not confirmed it will default to the saved settings for that specific tray. Also remember to check the paper guides are aligned correctly to ensure the sensors are recognizing the correct size of the paper loaded.
Not recognizing a new consumable 
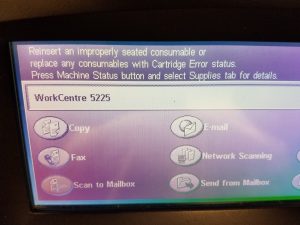
Does your copier occasionally produce an error code stating a consumable is not recognized? This can be for a number of reasons.
- Consumable replaced too early – It is best to only replace consumables when your copier prompts you to do so. Unless you are having print quality issues you should not need to replace until the consumable is at 0%.
- Consumable replaced when prompted – Sometimes your copier may state consumable not recognized even though it asked you to replace. To rectify this try removing the consumable in question, reboot the device and when the device prompts you again to replace then do so.
- Defective consumables – Occasionally some consumable can be defective. This is usually due to the microchip being defective and not the actual consumable itself. If the copier cannot read the microchip then it cannot confirm the consumable has been replaced. Try the same as above and reboot the device then replace the consumable when prompted. If it is still not recognized and you have another spare try using that one. Defective consumables can be reported to Xerox who will send out free of charge replacements.
Want to know more? Give us a call; we would love to help you. We can provide quotes for a range of different copiers and finance plans. We are Xerox authorized and have been selling and leasing copiers for 10 years and we would love to help your company!
NEED A QUOTE NOW?
You'll Get a Real Quote in Under 2 Minutes!
